Setting up Wireguard
When you self-host, access becomes crucial. If you’re anything like me, you probably have several services hosted, and a portion of them are accessible over the web. For instance, I have this website, running on a Raspberry Pi within my home network, which I make public and secure using Cloudflare Tunnels.
However, what about the services you’d rather not expose to the internet? How can we access them when we’re away from our home network without making them publicly available? This is where WireGuard VPN comes into play.
WireGuard is a modern and high-performance VPN (Virtual Private Network) protocol designed to establish secure and efficient encrypted network connections. Its primary focus is on simplicity and minimalism, aiming to reduce complexity while maintaining robust security.
One of the main advantages of WireGuard is its lightweight codebase, which makes it easier to audit and comprehend compared to older VPN protocols. It incorporates state-of-the-art cryptographic techniques, such as the Noise protocol framework, to ensure secure communication between devices.
Now that we have an understanding of WireGuard, let’s delve into setting it up. If you prefer a visual guide, I’ve also prepared a video demonstrating the process.
SponsoredOverview of the Tools
Before we begin, let’s take a quick look at the tools we’ll be using:
- Docker: A containerization platform that allows you to deploy applications in isolated environments.
- Portainer: A management interface for Docker that simplifies deployment and management of containers.
- Zimaboard Server: Any ARM or x86 server will suffice for hosting the WireGuard VPN.
- Port forwarding on the router: Configuring the router to forward incoming traffic to the WireGuard VPN server.
Setting Up with the Compose File
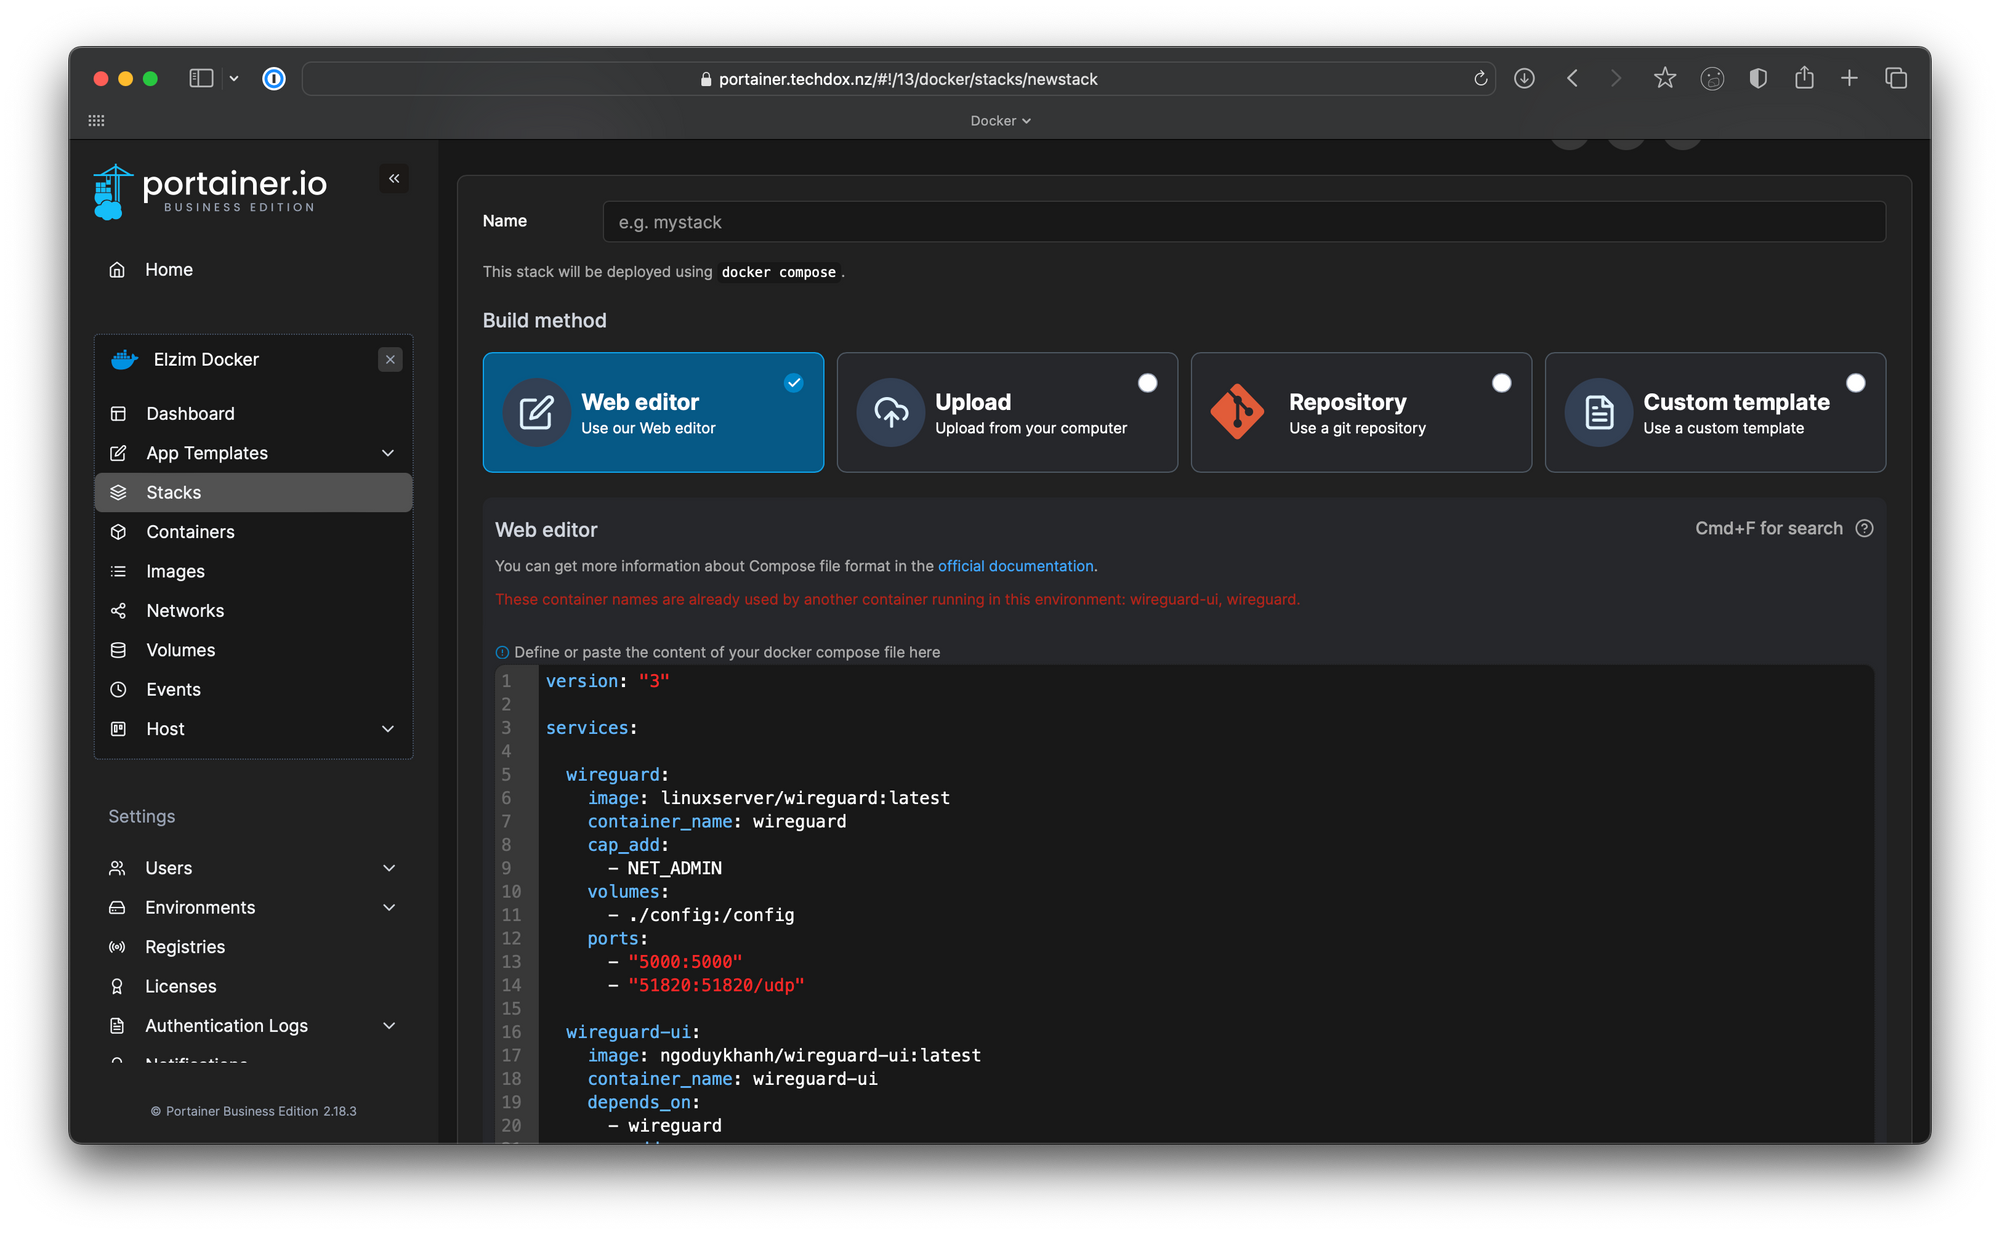
To start, we’ll utilize a compose file that streamlines the setup process. The compose file is sourced from my Techdox Bookstack, where you can find not only the file itself but also comprehensive documentation related to WireGuard VPN setup.
version: "3"

services:

  wireguard:
    image: linuxserver/wireguard:latest
    container_name: wireguard
    cap_add:
      - NET_ADMIN
    volumes:
      - ./config:/config
    ports:
      - "5000:5000"
      - "51820:51820/udp"

  wireguard-ui:
    image: ngoduykhanh/wireguard-ui:latest
    container_name: wireguard-ui
    depends_on:
      - wireguard
    cap_add:
      - NET_ADMIN
    network_mode: service:wireguard
    environment:
      - SENDGRID_API_KEY
      - EMAIL_FROM_ADDRESS
      - EMAIL_FROM_NAME
      - SESSION_SECRET
      - WGUI_USERNAME=admin
      - WGUI_PASSWORD=password
      - WG_CONF_TEMPLATE
      - WGUI_MANAGE_START=true
      - WGUI_MANAGE_RESTART=true
    logging:
      driver: json-file
      options:
        max-size: 50m
    volumes:
      - ./db:/app/db
      - ./config:/etc/wireguard`
This compose file sets up a WireGuard VPN server and a corresponding user interface for managing the VPN connections. It includes two services: the WireGuard service and the WireGuard UI service. The WireGuard service uses the “linuxserver/wireguard” image, while the WireGuard UI service utilizes the “ngoduykhanh/wireguard-ui” image.
Using Portainer for Deployment
At this stage, you can run the docker-compose up -d command to deploy the stack. However, if you prefer a graphical interface for managing your containers, we can use Portainer.
- Open Portainer and navigate to your Docker environment.
- Select “Stacks” and choose the “Web editor” option to paste the compose file.
- Click “Deploy” to initiate the deployment process.
Once the deployment is complete, you can see the deployed stack and the two containers declared in the compose file.
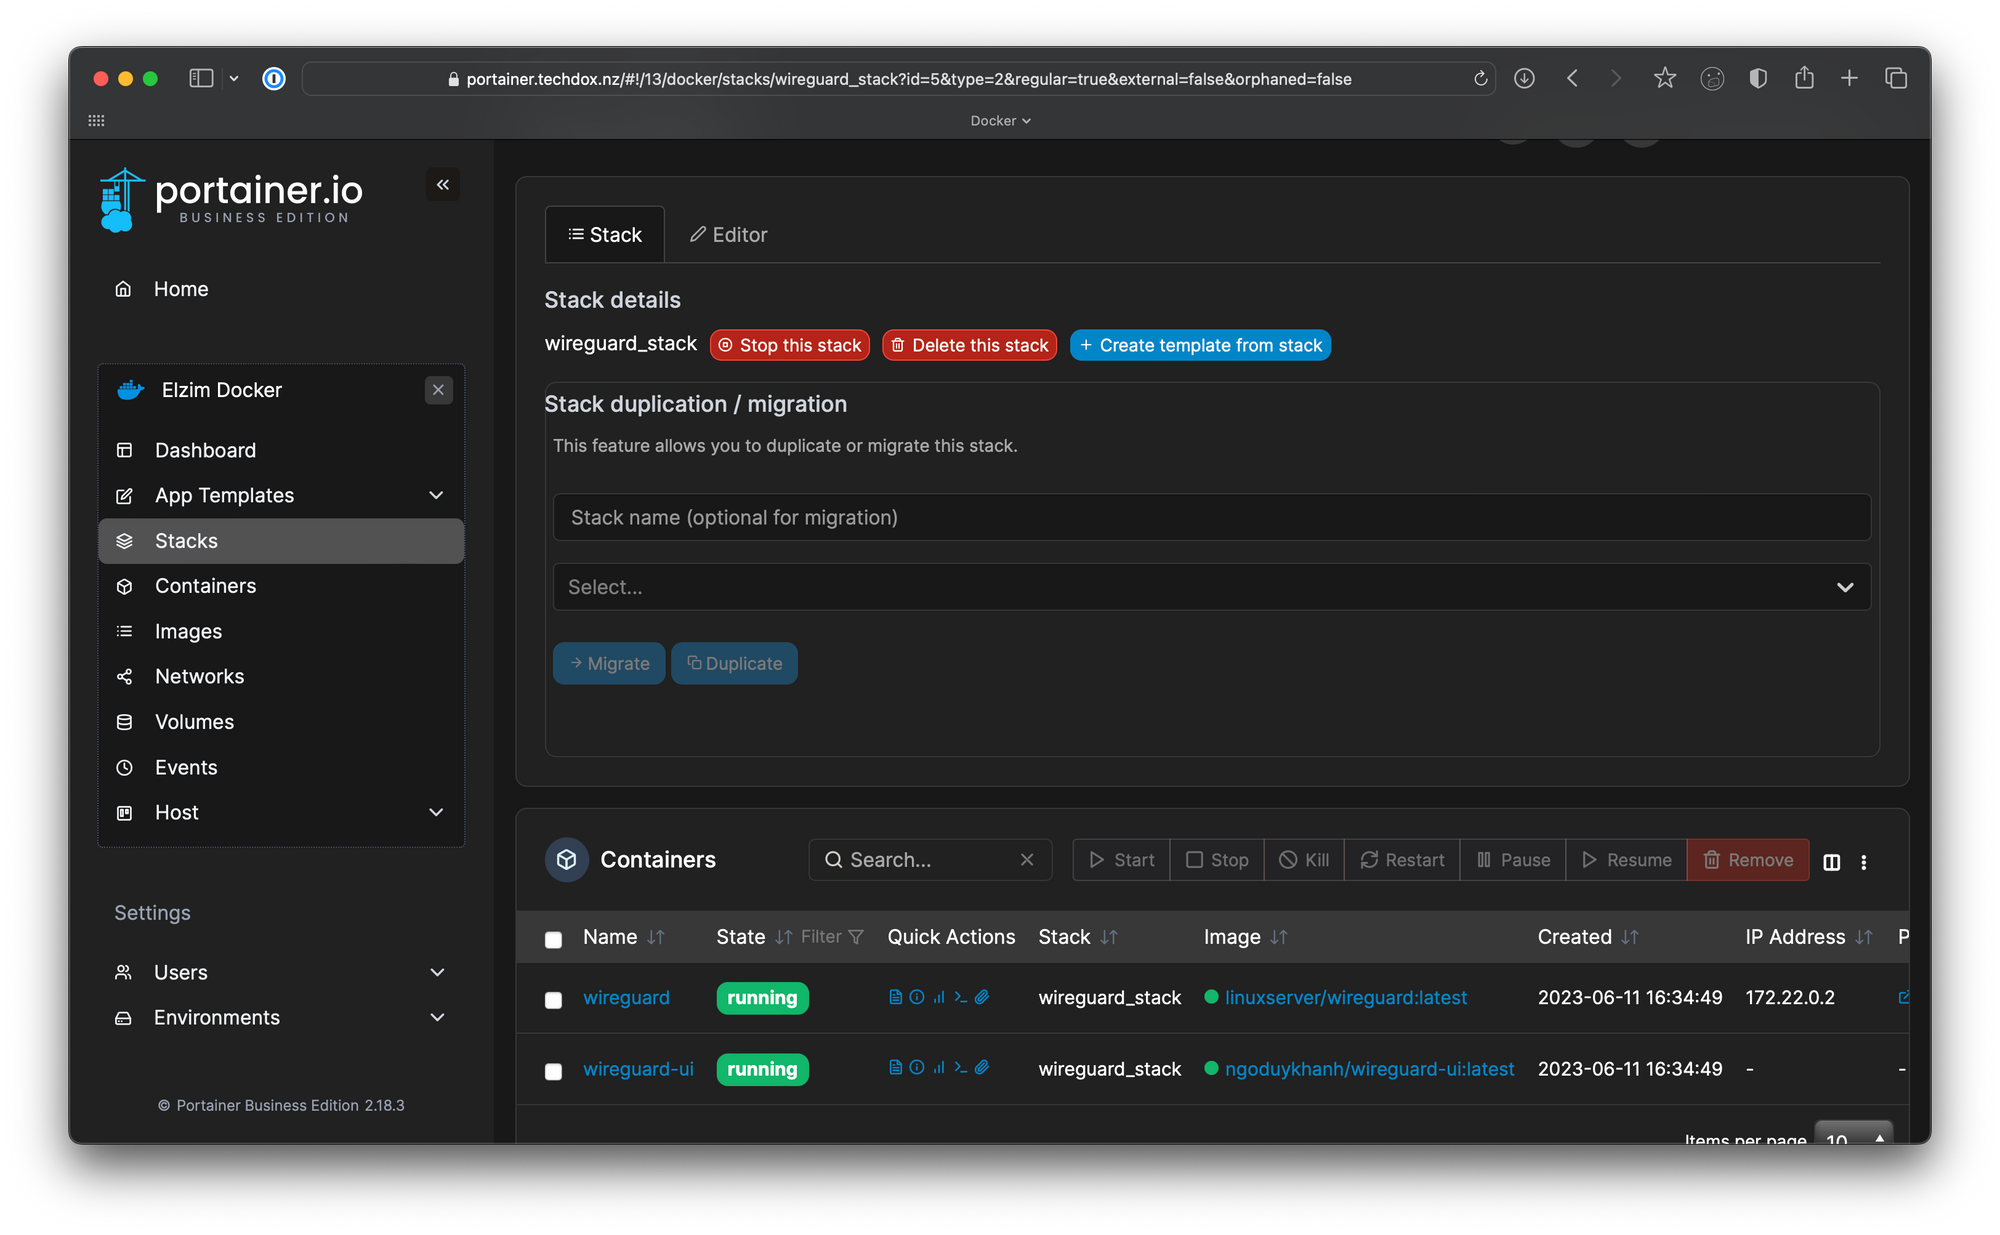
To access the WireGuard UI, navigate to the wireguard-ui service on port 5000 and log in using the credentials you set in the environment variables within the Docker compose file.
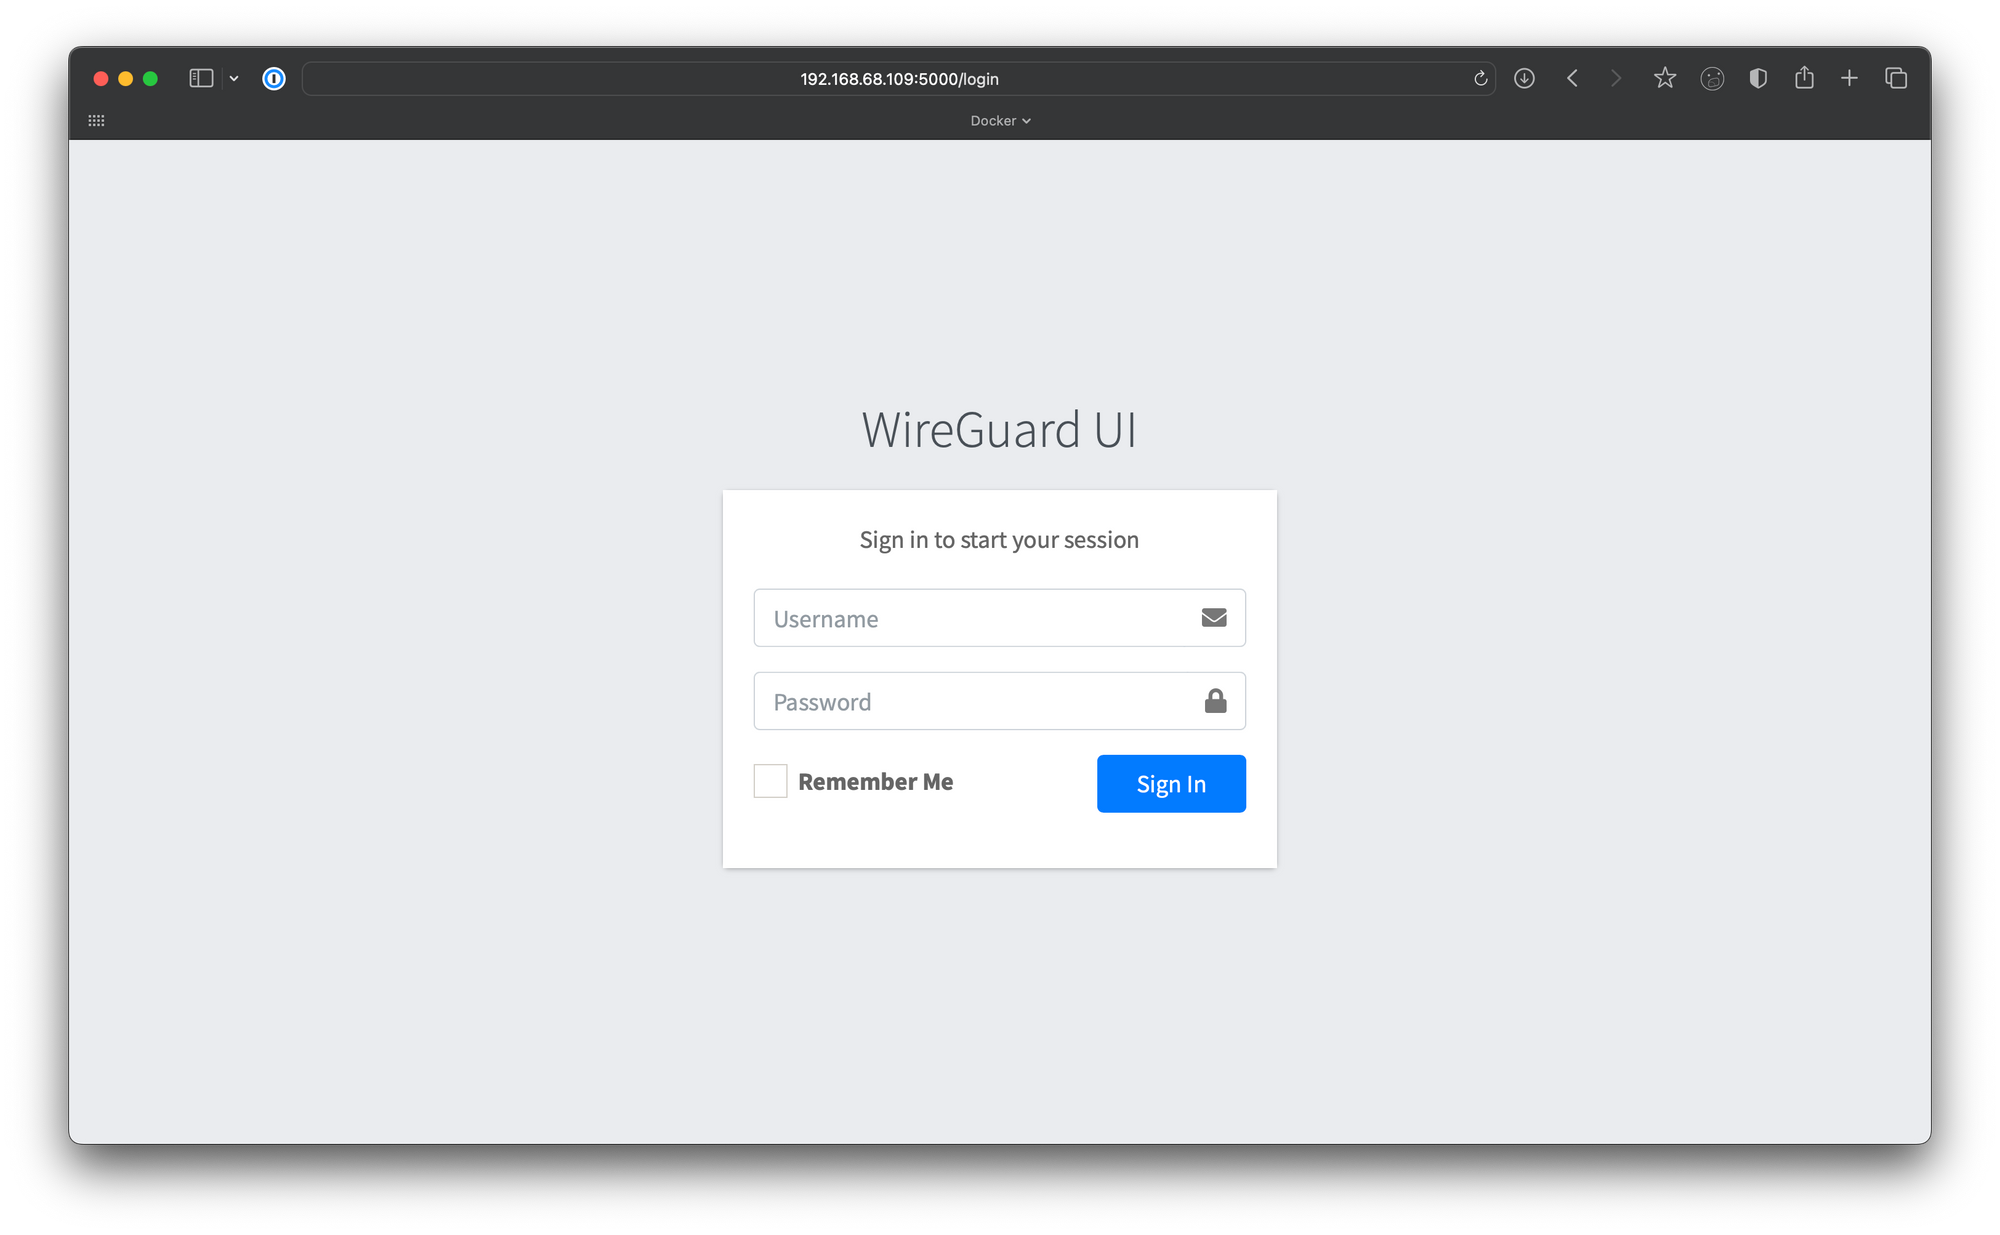
Let’s login with out credentials we set in the environment variables within the Docker compose file and start setting up the final components of Wireguard.
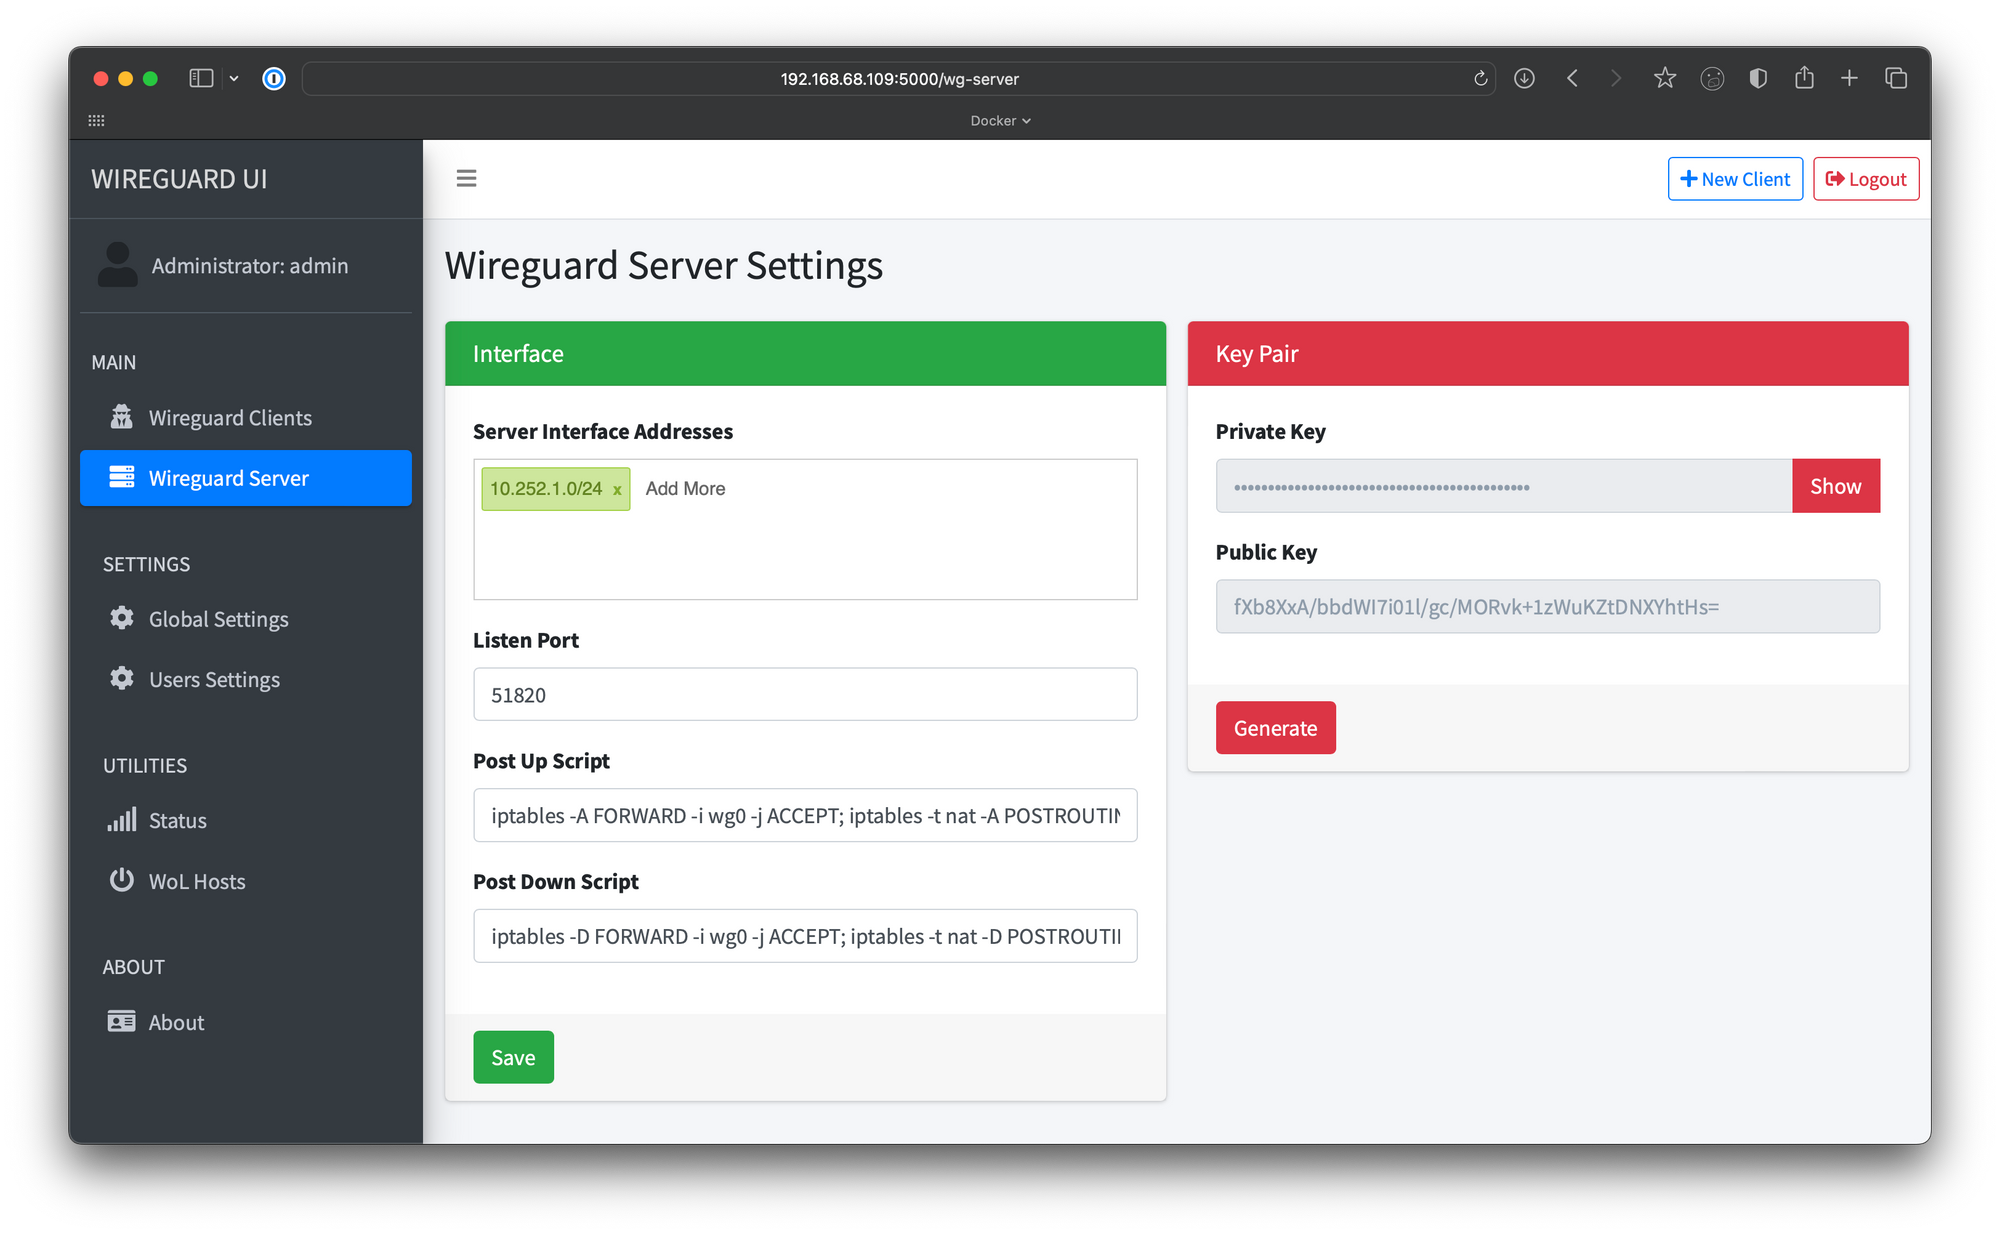
Configuring WireGuard Server
To finalize the setup, we need to add the Post Up and Post Down scripts to the WireGuard server section. These scripts allow traffic to reach our WireGuard interface in the Docker container. Here are the scripts:
Post Up Script:
iptables -A FORWARD -i wg0 -j ACCEPT; iptables -t nat -A POSTROUTING -o eth0 -j MASQUERADE`
Post Down Script:
iptables -D FORWARD -i wg0 -j ACCEPT; iptables -t nat -D POSTROUTING -o eth0 -j MASQUERADE`
Once you’ve added these scripts, click “Save” and then “Apply Config” in the top-right corner.
Provided you’ve followed these steps and port 51820 has been forwarded on your router, your VPN is now set up! You can now add clients and enjoy the secure benefits of WireGuard.
If you’d like to see this setup in action, check out the video above.